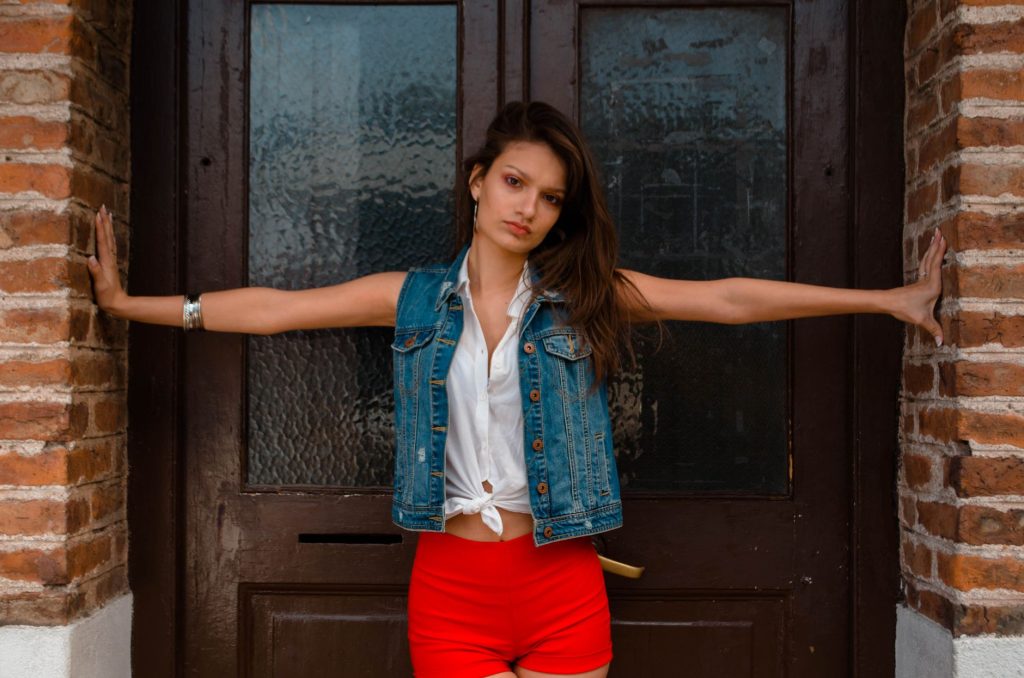
When it comes to photography, poses can make all the difference in the world. Understanding how to pose your arms correctly is key to achieving flattering and natural-looking pictures. Whether you’re taking a family portrait, a professional headshot, or snapping a candid with friends, the right arm position can elevate your photo significantly.
This guide will walk you through various techniques for posing your arms, helping you find the best stances for different settings, outfit types, body types, and personal styles. With these tips and tricks, you’ll exude confidence and look your best in every snap.
How to Pose Arms for a Photo?
To pose your arms effectively, focus on angles, shapes, and natural placement that flatters your body and complements your outfit. Understanding your body type and making minor adjustments in your arm positioning can dramatically enhance your appearance in photos.
Understanding Arm Dynamics
Before we delve into specific poses, it’s essential to understand the basic dynamics of arm positioning. The goal is to create flattering lines and shapes with your arms, avoiding any pose that may appear stiff or awkward. Here are foundational principles to keep in mind:
- Relaxation is Key: Tension in your arms can lead to stiff poses. Keep your arms relaxed to achieve a natural look.
- Angles Over Straight Lines: Angled arms create more dimension in photos than straight limbs. Aim for triangles or curves.
- Use Your Environment: If possible, incorporate nearby elements like walls, furniture, or props to give your arms a purpose.
Common Arm Positions and Techniques
Classic Poses
These traditional poses are great for formal portraits and are versatile across various outfit styles.
- Crossed Arms: This pose can convey confidence but be cautious; it can also appear closed off. Make sure to keep your body aligned and your shoulders relaxed.
- Hands on Hips: Place your hands on your hips to define your waist and create a flattering silhouette. Angle your body slightly away from the camera for added effect.
- One Arm Raised: Raise one arm and place your hand behind your head or on your neck, gently tilting your head towards that arm. It adds interest to your pose.
Dynamic and Candid Poses
These poses are ideal for casual photography, where you want to capture a more relaxed vibe.
- Hands in Pockets: Slip your hands into your pockets to convey a laid-back attitude. Keep your arms slightly bent to maintain a natural curve.
- Walking or Movement: Incorporate motion into your photos. Swing your arms naturally as you walk or take a step; this adds life to the image.
- Playful Gestures: Use your arms to gesture during a conversation, smile, or interact with your surroundings. This keeps your pose feeling fluid and fun.
Creating Shapes with Your Arms
Mindfully shape your arms to create a more appealing look. Here are several effective techniques:
- Arm Extensions: Extend one arm slightly outward while keeping the other closer to your body. This creates a dynamic line that draws the eye across the photo.
- Curved Arms: Bend your elbows softly and position your arms in a way that forms gentle curves, which can soften your appearance.
- Use a Prop: If you’re unsure what to do with your arms, consider incorporating a prop. Holding a handbag, coffee cup, or wearing a statement jacket can guide your arm placement.
Tips for Different Settings and Outfits
Your arm positioning may vary based on the context of the photo and the outfit you’re wearing. Here are tailored suggestions for different settings:
Casual Settings
In casual photos, the aim is to look relaxed and authentic. Here are some outfit inspirations and arm poses:
- Outfit Idea: A comfy tee paired with denim jeans.
- Arm Pose: Lean against a wall with your arms crossed or one hand casually touching your hair to create a relaxed look.
- Outfit Idea: A sundress in a floral print.
- Arm Pose: Place one hand on your hip and let the other arm drape down, emphasizing the dress’s flow.
Formal Settings
In a formal context, such as a wedding or a professional setting, an elegant pose enhances your overall look.
- Outfit Idea: A fitted dress or tailored suit.
- Arm Pose: Stand with one hand at your side and the other resting gently across your abdomen or near your face for an elegant touch.
- Outfit Idea: A chic jumpsuit.
- Arm Pose: Place both hands slightly apart to create curvature, ensuring relaxed shoulders to maintain poise.
Outdoor Settings
Outdoor photography often captures natural moments, making it perfect for playful poses.
- Outfit Idea: A light blouse and shorts.
- Arm Pose: Raise both arms up as if enjoying the sun or behind your head while standing for a more adventurous shot.
- Outfit Idea: A maxi dress.
- Arm Pose: Let the breeze catch the sleeves, extending your arms outward to create fluid movement in the image.
Seasonal Variations
Your posing strategy might shift with the seasons, reflecting the mood and style of your outfits.
Spring & Summer
- Outfit Suggestions: Light fabrics such as linen and cotton, floral patterns, and bright colors.
- Arm Pose Idea: Use airy gestures, such as a light wave or running your fingers through your hair, as these can create a lively impression.
Autumn & Winter
- Outfit Suggestions: Layered looks with sweaters, scarves, and jackets, often in richer tones.
- Arm Pose Idea: Hold your jacket or scarf closer around you, which not only showcases the fabric but adds some warmth to the photo.
Body Types and Positional Adaptations
While these poses can work for everyone, it’s essential to adapt them according to your body type. Here are some adjustments you might consider:
- For Curvier Shapes: Avoid flat, straight-arm poses. Instead, emphasize curves by bending elbows and positioning hands to create an hourglass shape.
- For Athletic Builds: Opt for poses that soften lines, like hands on hips or gentle arm placements, to counterbalance muscular bias.
- For Lean Figures: Create dimension by adding angles and twists to your poses, so they don’t appear too linear.
Common Mistakes to Avoid
Even seasoned photographers can fall into some common pitfalls. Recognizing these can help you achieve better photos:
- Overly Stiff Arms: Resist the urge to hold your arms rigidly. Aim for a relaxed feel, even if it requires practice.
- Hiding Your Hands: Avoid positioning your arms or hands in a way that they aren’t visible. Subtly showcasing your arms can enhance your silhouette.
- Ignoring Angles: Establish dynamic angles instead of standing directly facing the camera. Angular poses typically yield more engaging images.
Practice Makes Perfect
As with any skill, practice is essential for perfecting your arm poses. Here are some methods to improve your photography poses:
- Use a Mirror: Practice poses in front of a mirror. This helps you visualize what looks best from different angles.
- Photo Challenges: Engage in photo challenges with friends where you can experiment with your poses without pressure.
- Analyze Old Photos: Review past photographs to identify what worked and what didn’t, adjusting your technique accordingly.
Taking the time to understand how to pose your arms effectively can transform your photography experience. Whether for social media, professional use, or cherished memories, mastering these techniques will ensure your images look effortlessly beautiful.
Now that you are equipped with arm posing knowledge, you can prepare for your next photoshoot. Remember that each pose should feel comfortable and true to your personality. Have fun experimenting!
For a deeper dive into posing techniques, consider exploring more on how to pose for modeling photos or check out tips for posing women in pictures.